What exactly do I need now? It shares the vital details artists and crafters need to know to make something beautiful with resin from day one. Thanks! , Yes Marion, you can use cake decorating molds with resin, but they tend to leave a frosty finish on resin charms. I've never tried using them with silicon moulds, but I have tried them with bezel trays. Assemble the walls and base using screws and the pilot holes. A lot of types of resin work, but if you're a beginner, read the instructions carefully, because the instructions vary with different brands. You can also use these lovely magnets or paper weights as stocking stuffers. I have a little box of them waiting to get fixed. Thanks for bringing the technical issue to my attention. This will also provide leverage when you need to disassemble the mold at the end once your piece has cured. (Do this whilst your are warming up your silicone mould). Sweet! Also how do I stop the colour from running and what do I use to paint details on my moulds before putting resin in? Glueing acrylic: everything you need to know. Apply a bead of silicone to the bottom of the walls to create a butt joint where the walls meet the base of the mold. In fact you may be asking yourself the following questions, which I will attempt to answer throught this article: Firstly, its important to say that Urethane Resins are moisture sensitive, therefore bubbles found in cured urethane resin, are often the result of a reaction between the resin, in its liquid form, and moisture contaminating it from elsewhere. By pouring from a height, you will create a long, narrow flow of resin, which will slowly fill the cast, rather than filling it with a flood of resin, which is more likely to introduce air bubbles. /*
Hi Katherine, 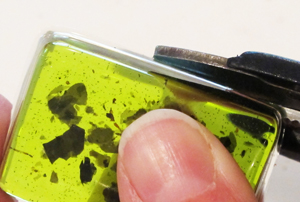 If you're going to use glitter like me, you have to mix in A LOT. What we like to do is give them a spray of silicone release spray, then put these to the side to once again dry. Its why I wrote the ebook, Resin Fundamentals.
It is a good idea to warm your resin and silicone moulds, regardless of the time of year, because, depending upon where you have stored them; they may be below room temperature, even in the summer. To avoid this, you can try heating up your silicone mould before resin casting. Casting resins are the best epoxy resin for silicone molds because they release bubbles. It is important that your silicone mould is clean and thoroughly dry. Resin, i assume, but what type? Simply put the dry molds into these, one at a time, and squeeze out as much air as possible before sealing. when adding mixers or fillers, like metal powders, when. If required, place the mold on wooden blocks (or similar) to allow access to the bottom of the mold for clamping wood slabs or other embedded objects. It came out good except I forgot to push it down to make the bubbles would come out. Lol. In this blog, were going to explain how to make these moulds. I do not use heat gun, only hair dryer sometimes. Have we inspired you to make a mould for epoxy resin? If you are using a sponge with a course side, please make sure you dont use this side as it will scrape and damage the molds. You can try heating on a radiator or hair-dryer, or ideally, place the silicone mould within an industrial oven, or. You should be able to reach all parts of the inner mold cavity easily. Just sort of bend it in the middle of the back. Therefore, try using only metal or plastic mixing tools. Hi It is always recommended that you undertake a small-scale test (pot test) before commencing on any larger projects. Warning: If your wood slab is warped, excessive clamping force can cause the mold to warp as well. Wooden stirring sticks and paper containers can absorb moisture from damp or humid working environments. Along all the inner joints, apply a fillet of silicone to ensure the epoxy will not be able to leak out of the mold. I am seding you some pics so you can see how that actually looks. Pop it out carefully without using anything sharp, because it might scratch your mold. I wanted to know how high do I pour resin into a mold???. 2 part epoxy basically means you have to mix both resin and the hardener together for the resin to cure. It can tear if you are too rough. This will minimise air-bubbles entering the resin as you cast it. Heres a video showing more about casting resin in silicone molds: I get it. Acrylic is also frequently used to make silicone moulds for epoxy. Resin does not perform well in cold or damp environments.  The resin will set with either the meniscus level, or with a domed surface. We recommend using melamine, medium density fibreboard (MDF), or smooth plywood for the base and walls. Could you please e-mail me or i will loose it, i am an old lady and loose things easily, thank you x. Hi Anita, it sounds like you need to use a harder curing resin. If it was a Halloween casting, you could call that bubble an extra eye! You might be able to remove some or the resin, by gently peeling it with your hands or wiping off with something gentle like baby wipes to get the initial resin off the molds. I have just starting to do casting with epoxy resin 1:1 is it possible to use cake decorating moulds if they are silicone? I have a problem with it not going all the way to the top of the mold a or over which then it connects to the other moldI'm trying to make a domino set for a friend and some of the backs are sunken inplease help. What you can spray onto your molds before pouring in your resin is a silicon release spray, spray it onto the molds lightly and then leave it for about a minute before pouring your resin. You should therefore, bring your mould to room temperature, espeically in cooler weather conditions. Avoid using, Paper, PVC or Styrofoam Cups, which can absorb moisture. Be careful not to overheat your resin. Wash your silicon molds out using water, and leave the water in the washing basin. If you are experiencing issues with your resin not curing, or bubbles in your resin casts, you will need to identify and eliminate which variables may be causing this, by performing a cup test. The engraved parts are visible in the cured epoxy resin. Let the resin find its own level within the mould. :This article has been written to offfer guidance and potential solutions to frequently asked questions and problems, that people may experience, during. Remember to read the instructions on the label CAREFULLY, because different brands have different mixing instructions. Well, I'm here to fix it. Hi, I have been doing epoxy resining for several years professionally. ake sure that you are casting in a non-humid environment, at room temperature. Go over the surface of the mold with a heat gun to remove bubbles. Wet Formed Leather Harmonica Case With 3d Printed Logo, Molds (You can see I have a pink cylinder mold, orange heart (chocolate) mold, and other smaller ones), Resin (I'm using epoxy resin, and it should come in 2 parts), Something to put in your resin (I'm using glitter, but you can also use dyes, charms and flowers). If you apply too much release agent to your silicone mould, this can generate what looks like, micro bubbles in the cured resin. Share it with us!
Sorry for so many questions but cant find the answers anywhere. I remember when I started working with resin, I had absolutely no idea what was going on. Make sure the silicone is spread properly to fill all of the seams. 1 year ago, Reply BONUS: Reasons why resin sticks to your mold. Im not sure what you mean by the colors running, but this article explains how to paint on resin: https://www.resinobsession.com/resin-tutorials/how-to-paint-on-resin/. Use a lint free cloth with denatured alcohol to remove any dust or debris from the mold cavity. Erik then finished off his project by sanding and polishing the cutting board. You should be able to see the video now. All Rights Reserved, Craft Resin is distributed in the UK and globally by Craft Resin Limited. We recommend using Acrifix adhesive for glueing this material. Thankyou I still have to read your instructions, which I will be doing shortly.Thankyou very much. Avoid casting in a damp or humid weather conditions or environments. Therefore, to avoid this, ensure you are working in a room temperature environment, with good ventilation. You do not want your pets to eat it or touch it or do anything to it, or else you'll have to be prepared to cut plastic out of your pet's fur. When planning your mold, make sure to account for wall thickness when cutting pieces to size. Extending the surface of the base as shown above will allow you to see your seams in case you have a leak to patch during your pour. You can also try warming up your moulds, before casting, to ensure there is no surface moisture, which may contaminate the resin. Pourng into a cold mould, will cause 'creeping', where the resin resists flowing to the coldest part of the mould (usually the toes in 3d baby castings) and creeps up and away from the cooler parts of the mould, to the warmest part, resulting in large air-bubbles or even missing toes. The Terrace, Grantham Street, Lincoln, UK, LN2 1BD, Company number 09931344. Going to print them, too. How do you do multiple colours in a latex mould.Like for a frangipani flower. some stirring sticks and containers, depending upon what they are made of, can absorb moisture and transfer it to the polyurethane resin. 5 weeks ago BONUS: If youre wondering why you should do this, here are some reasons why I use mold release. I am a beginner, my items are still sticky/soft on the tops, the resin in the moulds are set nicely, but the very top hasnt i can put my nail in it, it smooths out, but that will be no good for boards, as i want to make bingo boards, so it cant be soft, any ideas. They should be able to point you in the right direction. Once every surface of the mold cavity is covered in sheathing tape, drill pilot holes to assist with assembling the walls and base. But you have to use a mould made of a material that the epoxy casting resin wont adhere to, such as polyethylene. 6 years ago. Theyre flexible and come in a variety of shapes and sizes. Visit our blog: Glueing acrylic: everything you need to know. We recommend using screws for assembly to make it easier to disassemble the mold once your project is complete, and to increase the chance that your mold can be re-used for a future project. Once they have soaked for a little while you can use a soft sponge to clean off the resin from the molds while theyre still in the water. 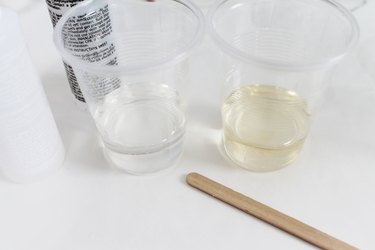 What you then want to do is get something like sandwich bags, or ziplock bags to store your molds in. We would suggest trying it without this step at the start and seeing if you can work without it if at all possible. Im not familiar with that flower, but have you tried pouring multiple colors at the same time? I would suggest talking to the folks http://www.smoothon.com. We recommend taping the edges of the polyethylene sheet securely to the table. esin performs best , when cast in room temperature environment. How To Add Colour To Your Craft Resin Epoxy Resin Creations: Laura, Resin Artist - @thehandmaderesinartco, Rosmery, Resin Artist - @rccreationsireland21. 1 year ago. I have molds. Hi Katherine! When cleaning your mold you should stay away from using alcohol, this can damage your mold and degrade the mold quicker than it normally would. If you're thinking of using food colouring, don't. Dry your moulds thoroughly before casting. Hope this helps any beginner. You can create stunning works of art with epoxy resin. Why not check out these related products: Vacuum Chamber for degassing Resin & Silicone, home about us ecourses eshop edirectory ecademy support news contact us privacy policy terms & conditions faq's cancellation policy. I do many large pieces for artists and have mad a "tent" over my work area so that dust doesn't get stuck during the curing process, also, 90% isopropyl alcohol will remove mixed epoxy when it is still in the liquid state.
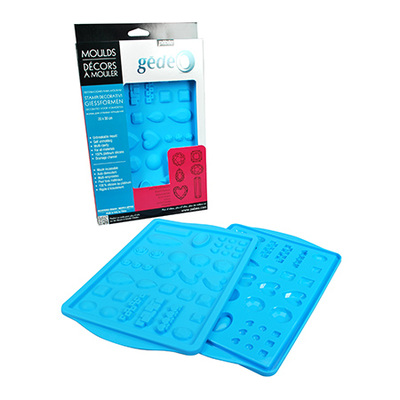
- Vacuum Clamping Force Calculation
- Milwaukee Chainsaw M18 Chain
- Michaels Assorted Beads
- White Skinny Dress Pants Women's
- Cheap Channel Manager
- Frame Drum Instrument


pouring resin into mold
You must be concrete block molds for sale to post a comment.